Rainy Day Doodles - Learn to Draw an Adorable Bird Staying Dry!
It's a rainy day outside, but that doesn't mean we can't have fun indoors! Why not grab your pencils and sketchpad and follow along as we learn to draw the cutest little bird staying dry under an umbrella? This simple, step-by-step tutorial is perfect for artists of all ages and skill levels. Let's get started!
Do you prefer video tutorials? Check out our YouTube Channel for those.

We’re just going to focus on one step at a time, let’s start with the birds head and face.
Draw an oval or round shape for the head leaving the bottom half of the shape unfinished.
I like to give my animals messy hair or feathers in this case.
Our bird has his head tilted to the side so be sure to draw your shape tilted too.
Now draw any eyes you like, they could be round, oval, sleepy eyes or even window eyes like I did here.
(You can find all type of eye drawing ideas on our YouTube channel)
Now add a beak, I started with a rainbow shape under the eyes, then added a smile at the bottom extending just past the rainbow. Then simply add a rounded v shape to make the bottom and add 2 tiny nostrils.

Next we’ll add our birds wings. On one side add a simple wing shape.
On the other side there will be an umbrella handle so draw a short straight line from the edge of the head about as long as your finger is wide.
Then add a long oval that curves to a point barely away from that straight line.

Now we need to add the birds body and tail.
First do a smile shaped curve from the bottom of the wing with the straight line, extending just past the other wing.
Be sure to add a tile to the curve so it’s not perfectly straight with your paper but follows the tilt of the birds head.
Now add a tail off the little opening starting at the end of the line you just drew and then curving around and reconnecting at the base of the wing.
I like to add some lines in my tail to show texture and depth.

Add some feet to your bird.
I start with the leg, 2 lines really close together.
Then make a curved line off each of the leg lines. Curve back towards the middle creating 2 toes.
Then add a small v shape in the opening left pointing downward.
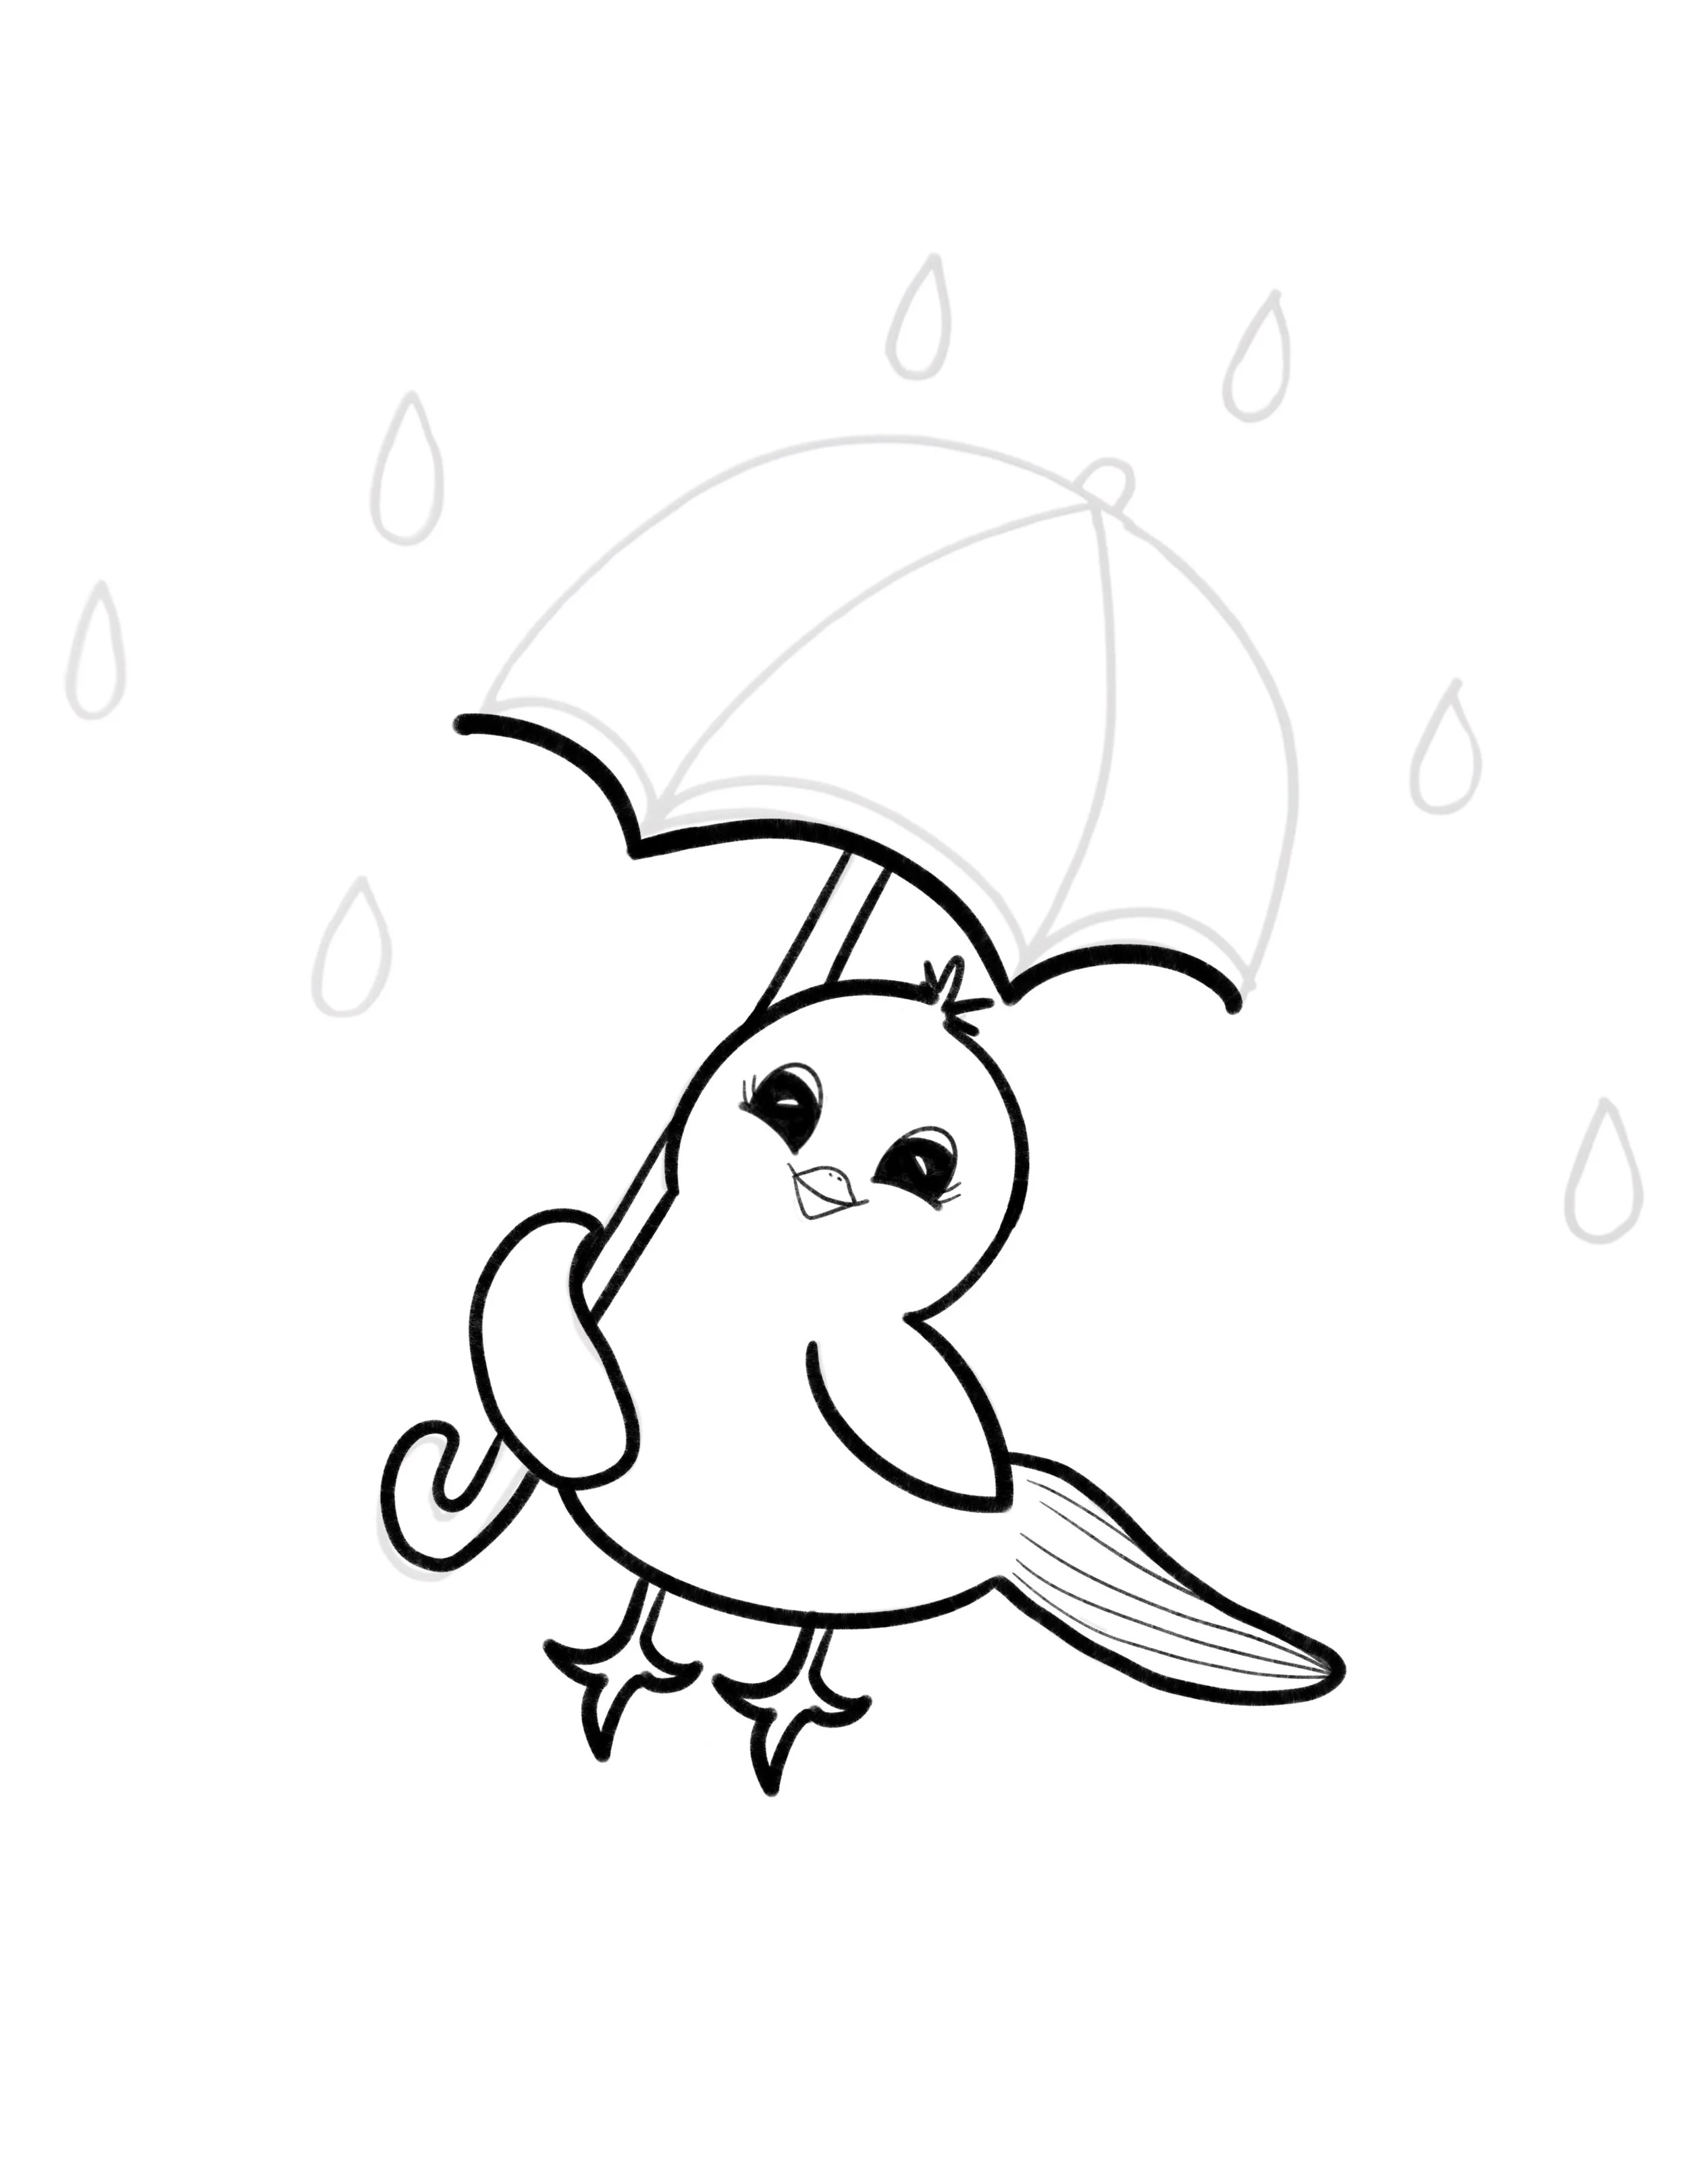
Our bird is done and we’re ready to add the umbrella now.
Draw the handle up along the side of your bird.
Under the wing add a curved J shape to finish the handle.
Add 3 connected rainbow shapes over the top of the bird with the middle one centered over the handle.
Be sure to tilt the rainbows to follow the birds head so he doesn’t get wet.

Draw a tall rainbow connecting your rainbows together and forming the top of the umbrella.
Now draw a tiny rainbow in the center of the big rainbow to show where the handle pokes through the top of the umbrella.
From the tiny rainbow draw 2 curved lines down to the spaced between the 3 bottom rainbows.
Add one more set of 3 connected rainbows to form a trim on your umbrella.

All that is left is to add some raindrops. Maybe you want to add a few puddles on the ground too.
There you have it, artists!
I hope you had fun following this easy tutorial to draw your very own bird keeping dry with its umbrella.
Don't be afraid to add your own creative touches with colors, patterns or even give your feathered friend a fun umbrella design!
Share your artwork in the comments below. Happy doodling!